Monday, July 29, 2013

My Scentsy booth display at the County Fair

I was so blessed to be able to have a Scentsy booth this year at our local county fair!!!
In previous years it's been a couple of ladies from a town about 3-4 hours north of my town and not even in our county and it seemed as though no one from our county was going to get a booth.  When I had called and asked if someone from our county could have a booth I was told that the other ladies had first dibs because they'd had the booth the year before.  Last year our Scentsy Convention was held the same week as the fair and I assume the ladies attended Convention instead of having a booth because there was no Scentsy booth to be found.  Finally...I had my chance!  :)  WOO HOO!
The ladies from the fair office called me in March and asked if I'd still be interested in having a Scentsy booth and HECK YES, I jumped all over that!  Hee hee!  I was so nervous about the whole thing just because I'd never done such a big event before and wasn't sure how much stock I'd need.  I also spent countless hours searching Pinterest and Google for display ideas.  Scentsy colors are usually purple & green with some black but that's not really my style.  I'm more of a shabby chic/rustic/country type girl so I decided to go with that.  I've shared a few of the projects that I worked on in previous posts so thought I'd share how everything turned out!
 
Since there was a booth right in front of me it was hard to get a straight-on shot of the booth but you get the idea.  :)
 
The metal display stand on the right, in the back is one I ordered online from a store that sells display stands for stores.  I can't remember where I got it exactly but it's come in handy for every event I've done!  I think I paid around $60 for the stand and 30 hooks.  The black shelves in the front I got at Home Depot for $24.


I loved this table!  My hubby built the wooden crates and the birdhouse and I painted them cream with antique glaze.  I made the burlap banner and the tablecloth was a great find at a flea market for only $15! 


See my handsome helper in the back?  Isn't he the cutest?!  :)
The black stand here is one that my Director's husband made and gave to anyone on the team that sold at least $2000 in one month.  YAY!  I love it!
My super fabulously talented friend, Heidi from Everyday Cookies made the chalkboard toolbox which was PERFECT for holding my catalogs!  Go check out her blog!  She makes the cutest wooden signs too!
One of my warmers was broken so my husband took out the electrical insides, covered the bottom and then I used it for a pen holder!
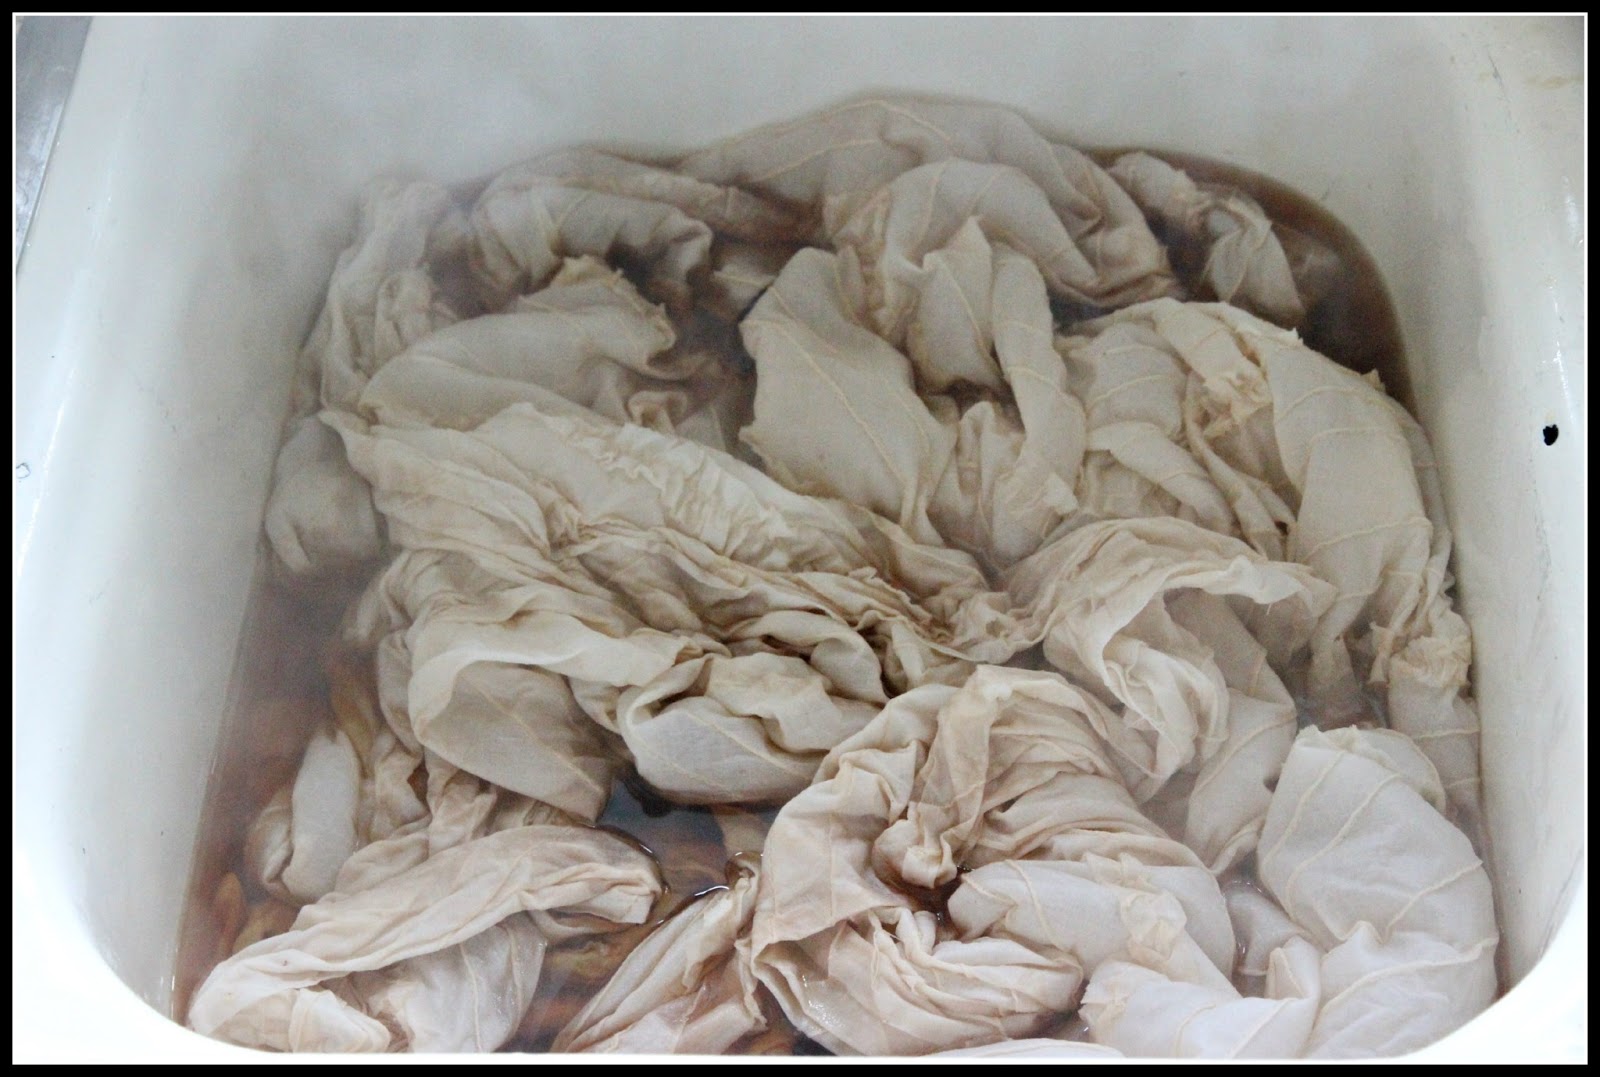
The tablecloth is the one I posted about earlier that I stained using tea bags.  I love how it matched everything so well!
 
 
My husband built me this little shelf and the wooden signs.  I used chalkboard paint on the signs and they ended up being perfect for my display!


It was a VERY long 5 days but totally worth the 13 hour days and very little sleep!
I got to see so many of my wonderful friends, made some new ones, sold almost all of my stock, got lots of new customers, a new possible recruit, lots of people wanting to have parties and Lord willing, I'll do it all again next year!  :)
 

Saturday, July 20, 2013

I'm a mean girl!

So I've heard it said in a few sermons that the longer we walk with the Lord, the more we realize just how disgusting we are...and boy isn't that the truth?!  I used to think that I had it pretty together I mean I was polite to people, mostly upbeat & optimistic, joyful, had good morals, didn't cuss people out or punch them even when they deserved it (LOL), showed love, spent daily time with the Lord, etc.  The last few months I've really prayed for the Lord to show me things that I needed to work on that I had been oblivious to and He's been peeling away the layers and showing me just what a wretch I am!  I'm not a nice person...at least not as nice as I had fooled myself into thinking I was. 

Those moments when I'm alone, usually doing routine, mindless things like taking a shower or washing the dishes or painting...that's when I've come to realize that my mind starts to go on an ugly, ugly journey!  It's like satan sits back with a remote and just starts clicking through the tv of my mind and showing snippets of things that really set me off on a rampage.  I never say it out loud but in my head I'm screaming at people that have ruffled my feathers, done me wrong, hurt me or just plain drive me nuts.  You'd be amazed at how much time got spent on these clips and I had never even realized it.  BUT...God is good and daily I have to pray for help in stopping my thoughts, meditating on scripture and refocusing my thoughts onto what is TRUE, what is GOOD, what is PRAISEWORTHY and not on the anger, lies and ultimately hatred!  It's a daily struggle, several times a day but it's getting easier.  I am able to notice what's happening much quicker and really get myself turned back around.  Another thing that I've learned that helps even stop the first click of the remote is to turn on praise & worship music and just focus on the words of the songs and sing & dance around while I'm doing those activities!   

Another area that I struggle with is while I'm driving!  Music doesn't help so much with this one! 

The other day the Lord totally smacked me!  :)

I was singing along with my praise & worship music, praying intermittently and then someone cuts me off.  I mumble some comment about them being a stupid jerk and imagine being able to "bump" them with my van like a game of bumper cars...to teach them a lesson.  Then after a minute or two when I've cooled off I go back to singing music to my Lord.  Then another car comes along and won't let me into the lane I need to get into so I can turn down the street to my house and I say out loud what an inconsiderate a** they are.  Yes, *hanging head low and ashamed*, when I get mad, every once in awhile a curse word comes out.  I'm not proud and I certainly hate that I do it but it's like a reaction that happens before I even think about it.  A dear sweet mentor friend of mine said on a few occasions that whatever we are filled with will come out when life "bumps" us.  Yikes.  I'm so not full of very much goodness then!  :(  The Lord was gracious enough to really speak to my heart about how much of a contradiction it is that one second I'm singing about how much I love Him and want to be like Him (empty me Lord and fill me with You) and then the next second I'm cussing out a fellow human being for inconveniencing me or whatever.  Funny thing is that if it was someone walking next to me, I'd NEVER say it to their face because that would be rude and ugly but it's just as bad to say it privately in my car or to even think it in my mind!  God hears my thoughts and sees my ugliness!  OUCH!  The real clincher for me is that I have noticed my kids make comments about other drivers.  DOUBLE OUCH!  I don't want my kids to have this "road rage" and struggle with ugly reactions to other drivers.  I'm so thankful that the Lord has brought this to my attention and that through the power of prayer and meditating on His Word, I'll be able to beat this sin down and I pray one day that I don't even have the ugly thoughts in the first place!

So there you have it.  The ugly truth of Christina.  I'm a mean girl!  But praise God for never giving up on me and helping me in my weakness! 

Friday, July 19, 2013

Tea Staining


I bought this adorable material at Joann's today.  Thankfully I had a 50% off coupon because it was $16.99/yd and I bought 2.5 yards to use for a tablecloth for my Scentsy booth at the County Fair.
 
I've got more of a vintage/shabby chic/country theme going on and this bright white wasn't going to match and I had heard about tea staining things to give it an older, vintage look so I figured I'd give it a whirl!  I soaked the material in the sink while I worked on the tea mixture.
 
 
I wanted to make sure it was all wet so it would stain evenly.
 
I then boiled a big pot full of water and put in 15 tea bags. 
 
 
I used this tea:
 
 
One blog I read said they used like 50 tea bags so I bought this big ol' package of tea and then other blogs I read used like 4 bags so I figured I'd try 15 and see what happened.
I boiled the tea bags for about 10 minutes, drained the water out of the sink and wrung out the material.  I then dumped the tea into the sink and let the material soak for 15 minutes.
 
 
Everything I read suggested different soaking times so I thought I'd try 15 minutes and see if it was right.  Worse case I could soak it again to darken it up.  Every 5 minutes I turned the material over to make sure it was all getting covered.  After 15 minutes I drained out the tea, rinsed the material in cold water, wrung it out and then hung it to dry in my bathroom.
The color was just what I wanted!!!   
I can't wait to get my booth set up and see everything together!
My husband built me 3 crates out of pallets tonight so I'm going to paint them and then I'll blog about it tomorrow!  :)


Wednesday, July 17, 2013

My Scentsy burlap banner

 
I am having a Scentsy booth at the Coos County Fair in Oregon next week and I'm frantically getting things together and trying to figure out how I want to decorate my booth.  I found this super cute eyelet ruffled tablecloth (well, it's actually a bedspread but I'm using it for my table) at a flea market type store in town for $15 and fell in love!  It doesn't really go well with my black Scentsy tablecloth so I set out to make a burlap banner to hang from the front table.
 
I cut burlap into about 5" x 6" squares (they don't have to be perfect, that's the beauty of the project).
I then googled "star template" and printed it out and painted white stars onto each piece.
 
Next I printed out the word using the "MTF Jumpin' Jack" font which you can download for free HERE.
I cut out each letter and used it as a stencil.
 
 
I used a multi-purpose acrylic black paint (Martha Stewart) to paint on the letters.
 
 
When it was all dried I took some twine and thread it through each piece so I could hang it from my table.  I think it turned out awesome!  Can't wait to set my booth up!!


Saturday, July 13, 2013

What has two thumbs and the world's best husband??? THIS GIRL!

Last night the kids & I went to church and hubby stayed home which is usual for us (someday it won't be *wink wink*).  I came home 2 hours later and hubby surprised me by working on a display stand for my Scentsy booth at the local county fair coming up this month.  The awesome thing is that I forgot that I had mentioned wanting him to build me this stand but he remembered and built one for me!  What an awesome guy he is!!!  He finished it this morning with the help of my stepson, Taylor!
 
 
It still blows me away that Taylor is now 16 and a head taller than both hubby & I!  Josh & I started dating when Taylor was just 2 years old so I've been in his life from almost the beginning!  Man, I feel old!  LOL!  We don't get to see Taylor very often so it was a HUGE blessing getting to spend the day with him and watch him work on a project with his dad!  I still pray that things will change and we'll get to see him more!  Nothing is impossible for the Lord! 
 
So, here's what the project looked like all put together:
 
Isn't it AWESOME?!?!  I am obsessed with birdhouses and cute birdie decorations/pictures so this is perfect for me!  I even have a little birdie family tattoo on my arm, that's how much I love them!
 
 
Because I am going to use this stand to display Scentsy plug-in warmers I wanted it to be a pretty neutral color so as not to take away from the plug-ins.  I painted the stand with about 3 coats of cream colored paint.
 
 
Then I painted the "door" and "window" frames a cranberry color, sanded it down and used my favorite antique glaze.
 
 
Isn't it super duper cute?!?!  I'm in love!  :)
 
 
I can't wait to use it for the fair!  I'm sure I'm going to get lots of comments on how fabulous it is!  :)  My hubby ROCKS!!
 
***Well, decided to paint a little birdie in the "window" just to give it a little more detail.  I love it.***
 
 Sorry for the poor picture quality, I used my cellphone and we don't have much lights on in the living room right now!  :)
 

Sunday, July 7, 2013

Ice Cream in a Bag

Yesterday was my sweet little girl's 5th birthday party.  Making ice cream in a bag was one of the items on our Summer Bucket List and I figured having the kids make their own ice cream at the birthday party would be fun.  The kids thought it was fun at first but their fingers were getting super cold and their arms tired out and of course the trampoline was calling their attention away so the moms and other adults ended up shaking it up the rest of the time!  :)  Once the ice cream was all shook up and ready to eat the kids were more than happy to climb down from the trampoline and eat away!


Here's the recipe I found online:

Prep Time 5 minutes
What you'll need

  • Ice cubes (enough to fill each gallon-size bag about half full)
  • 1 cup half and half
  • 1/2 cup salt (The bigger the granules, the better. Kosher or rock salt works best, but table salt is fine.)
  • 2 tablespoons sugar
  • 1/2 teaspoon vanilla extract
  • 1 pint-size ziplock bag
  • 1 gallon-size ziplock bag
  • Your favorite mix-ins such as chocolate chips, cereal pieces, or fresh fruit.

Serves 1
How to make it

Combine the sugar, half and half, and vanilla extract in the pint-size bag and seal it tightly.

Place the salt and ice in the gallon-size bag, then place the sealed smaller bag inside as well. Seal the larger bag. Now shake the bags until the mixture hardens (about 5 minutes). Feel the small bag to determine when it's done.
 
Take the smaller bag out of the larger one, add mix-ins, and eat the ice cream right out of the bag. Easy cleanup too!
 
We used crushed oreo cookies and chocolate chips as mix-ins and my hubby even used peppermint extract for a minty ice cream flavor!


Fabric Garland

My super duper talented friend Kari has a neat little business where she makes signs, benches, aprons, crates and all sorts of great stuff.  You should check her out: Bushel & A Peck she's got some really cool stuff she's made!!!  Plus, I just LOVE her business name!  It has a special place in my heart because my grandma, who happens to be one of my most favorite people in the world, used to sing that to me all the time when I was a kid! 
 
Anyways, I saw her patriotic garland and fell in love.  I had some leftover fabric from a project I had worked on back in Dec. 2011 and this project was perfect for it!
 
I cut the strips of fabric into 1" wide and about 6" long (measurements don't have to be exact, that's the fun of this project) and then tied them in knots around a long piece of twine.  It was a fun project that I could work on while visiting with my family & friends sitting on the couch.  I am really excited with how it turned out and think I need to make one for Christmas!!!


Thursday, July 4, 2013

Pizza & Fireworks

Did you know that Papa Murphy's Pizza has a build-your-own personal pizza?  In Oregon it only costs $4.99 and it's fun for the kids!  

 
This was one of the items on our Summer Bucket List and the kids loved it!
 
 
Check out Tatym's new shirt!  :)  We love Duck Dynasty and she's always walking around saying, "Happy, happy, happy!" 
 
Today just so happens to be the 4th of July and I was so excited to try to take pictures of fireworks!  My friend Rachel is an AMAZING photographer and I was super blessed to be able to take her first ever photography class last year and in the class she told us how to shoot fireworks.  If you have a free minute, you should go to her website and check out her work!  Rachel Diane Photography and you can find her business page on Facebook HERE.  She did our family photos back in May and they are by far, our most favorite family pictures EVER!
Anyways, 2 of my sisters are here visiting us and we had so much fun playing with sparklers and the camera tonight!  Here are a few pictures:


To get these shots I used the settings:
f/11
13"
ISO 100
 
:) HAPPY INDEPENDENCE DAY!!!!


Wednesday, July 3, 2013

Crayon Fun

Yesterday was our sweet Bitty's 5th birthday and we surprised her with a trampoline so the kids have been spending a lot of time on it.  It's such great exercise and entertainment for them but between jumps they were asking to watch tv and my rule this summer is no tv from 9am-5pm so I knew it was time to scratch another thing off of our Summer Bucket List! 

Today we decided to play with crayons!  First we took blow dryers and heated up crayons and made splatter art!


We tried having 2 blow dryers going at once but the breaker kept popping so while Keegan worked on his project, Tatym & I started working on making heart-shaped crayons out of the broken pieces!


To make those crayons, we just used a regular heart-shaped cupcake tin, heated the oven to 250* and baked them for 10 minutes (checking every 2 minutes).
 
While those were baking away we decided to try lighting a crayon on fire.  It was fun and interesting and the kids LOVED it!


So that was our fun project of the day!  Happy Wednesday!!!


Monday, July 1, 2013

Hutch makeover

So my awesomely amazing husband built me the bottom section of a hutch a few months ago.  He'll eventually build the top section for it but has been busy with other building projects.  I wanted to paint it with an antique glaze but no one in our small town sells the glaze so I opted to paint it with a layer of brown paint and then covered it with white paint and sanded down areas all around it so you could see the brown.  I chose a brighter white than I should have and it really bugged me because it wasn't looking the way I wanted it to.  Yesterday I got a wild hair and decided it was finally time to fix it!

This is what it originally looked like after I had painted it:

So I took it out and was going to sand it down quite a bit but then hubby thought that it wasn't necessary so the top part got a lot more sanding done to it than the rest of it:


I then ran to Walmart and chose a cream color to paint over it.  Here's how it looked after one coat of the cream:


It already looked SOOOO much better in my opinion!  I did add a 2nd coat of cream just because there were some spots on the top that really needed it!  A few weeks ago the family & I took a trip out of town and was able to spend over an hour at *insert angelic singing* HOME DEPOT!!!  YAY!  I love that store and could spend a crazy amount of time in it!  Anyways, I finally got my hands on some antiquing glaze (which I used on my Welcome post on Friday) so I added some to the hutch!  
I think it turned out fabulous and I am so much more in love with this piece of furniture!


Just for fun, here's a side-by-side of the two looks:


MUCH better!!!

Now I can't wait for hubby to get the top built!  :)